
You’ve probably heard many people refer to a Windsor knot for your tie, but have you ever learned how to tie a Windsor knot?
If it sounds intimidating to you, don’t worry. It may require a bit of practice, but it won’t be long before you perfect this elegant knot.
And it’s always nice to have a couple of different tie knots, just to change up your style now and then.
About the Full Windsor Knot
The Duke of Windsor was a popular British royal, and people often imitated his fashionable style.
So then, it’s no surprise that this way of knotting a tie was named for him, even though he never wore it.

Instead, this style of wearing a tie is likely a result of the public attempting to imitate his way of wearing a four-in-hand knot.
A full Windsor knot is also a very large knot and sits in a triangle shape.
It’s a comfortable way of wearing your tie because the wide knot creates a bit of room between your collar and the tie.
The full Windsor looks best with a spread collar shirt and complements a round face or strong jaw. It makes it perfect for your most formal needs.
How to Tie the Full Windsor Knot
When placing the tie around your neck, put the wider end over your right shoulder, hanging longer than the narrow end.
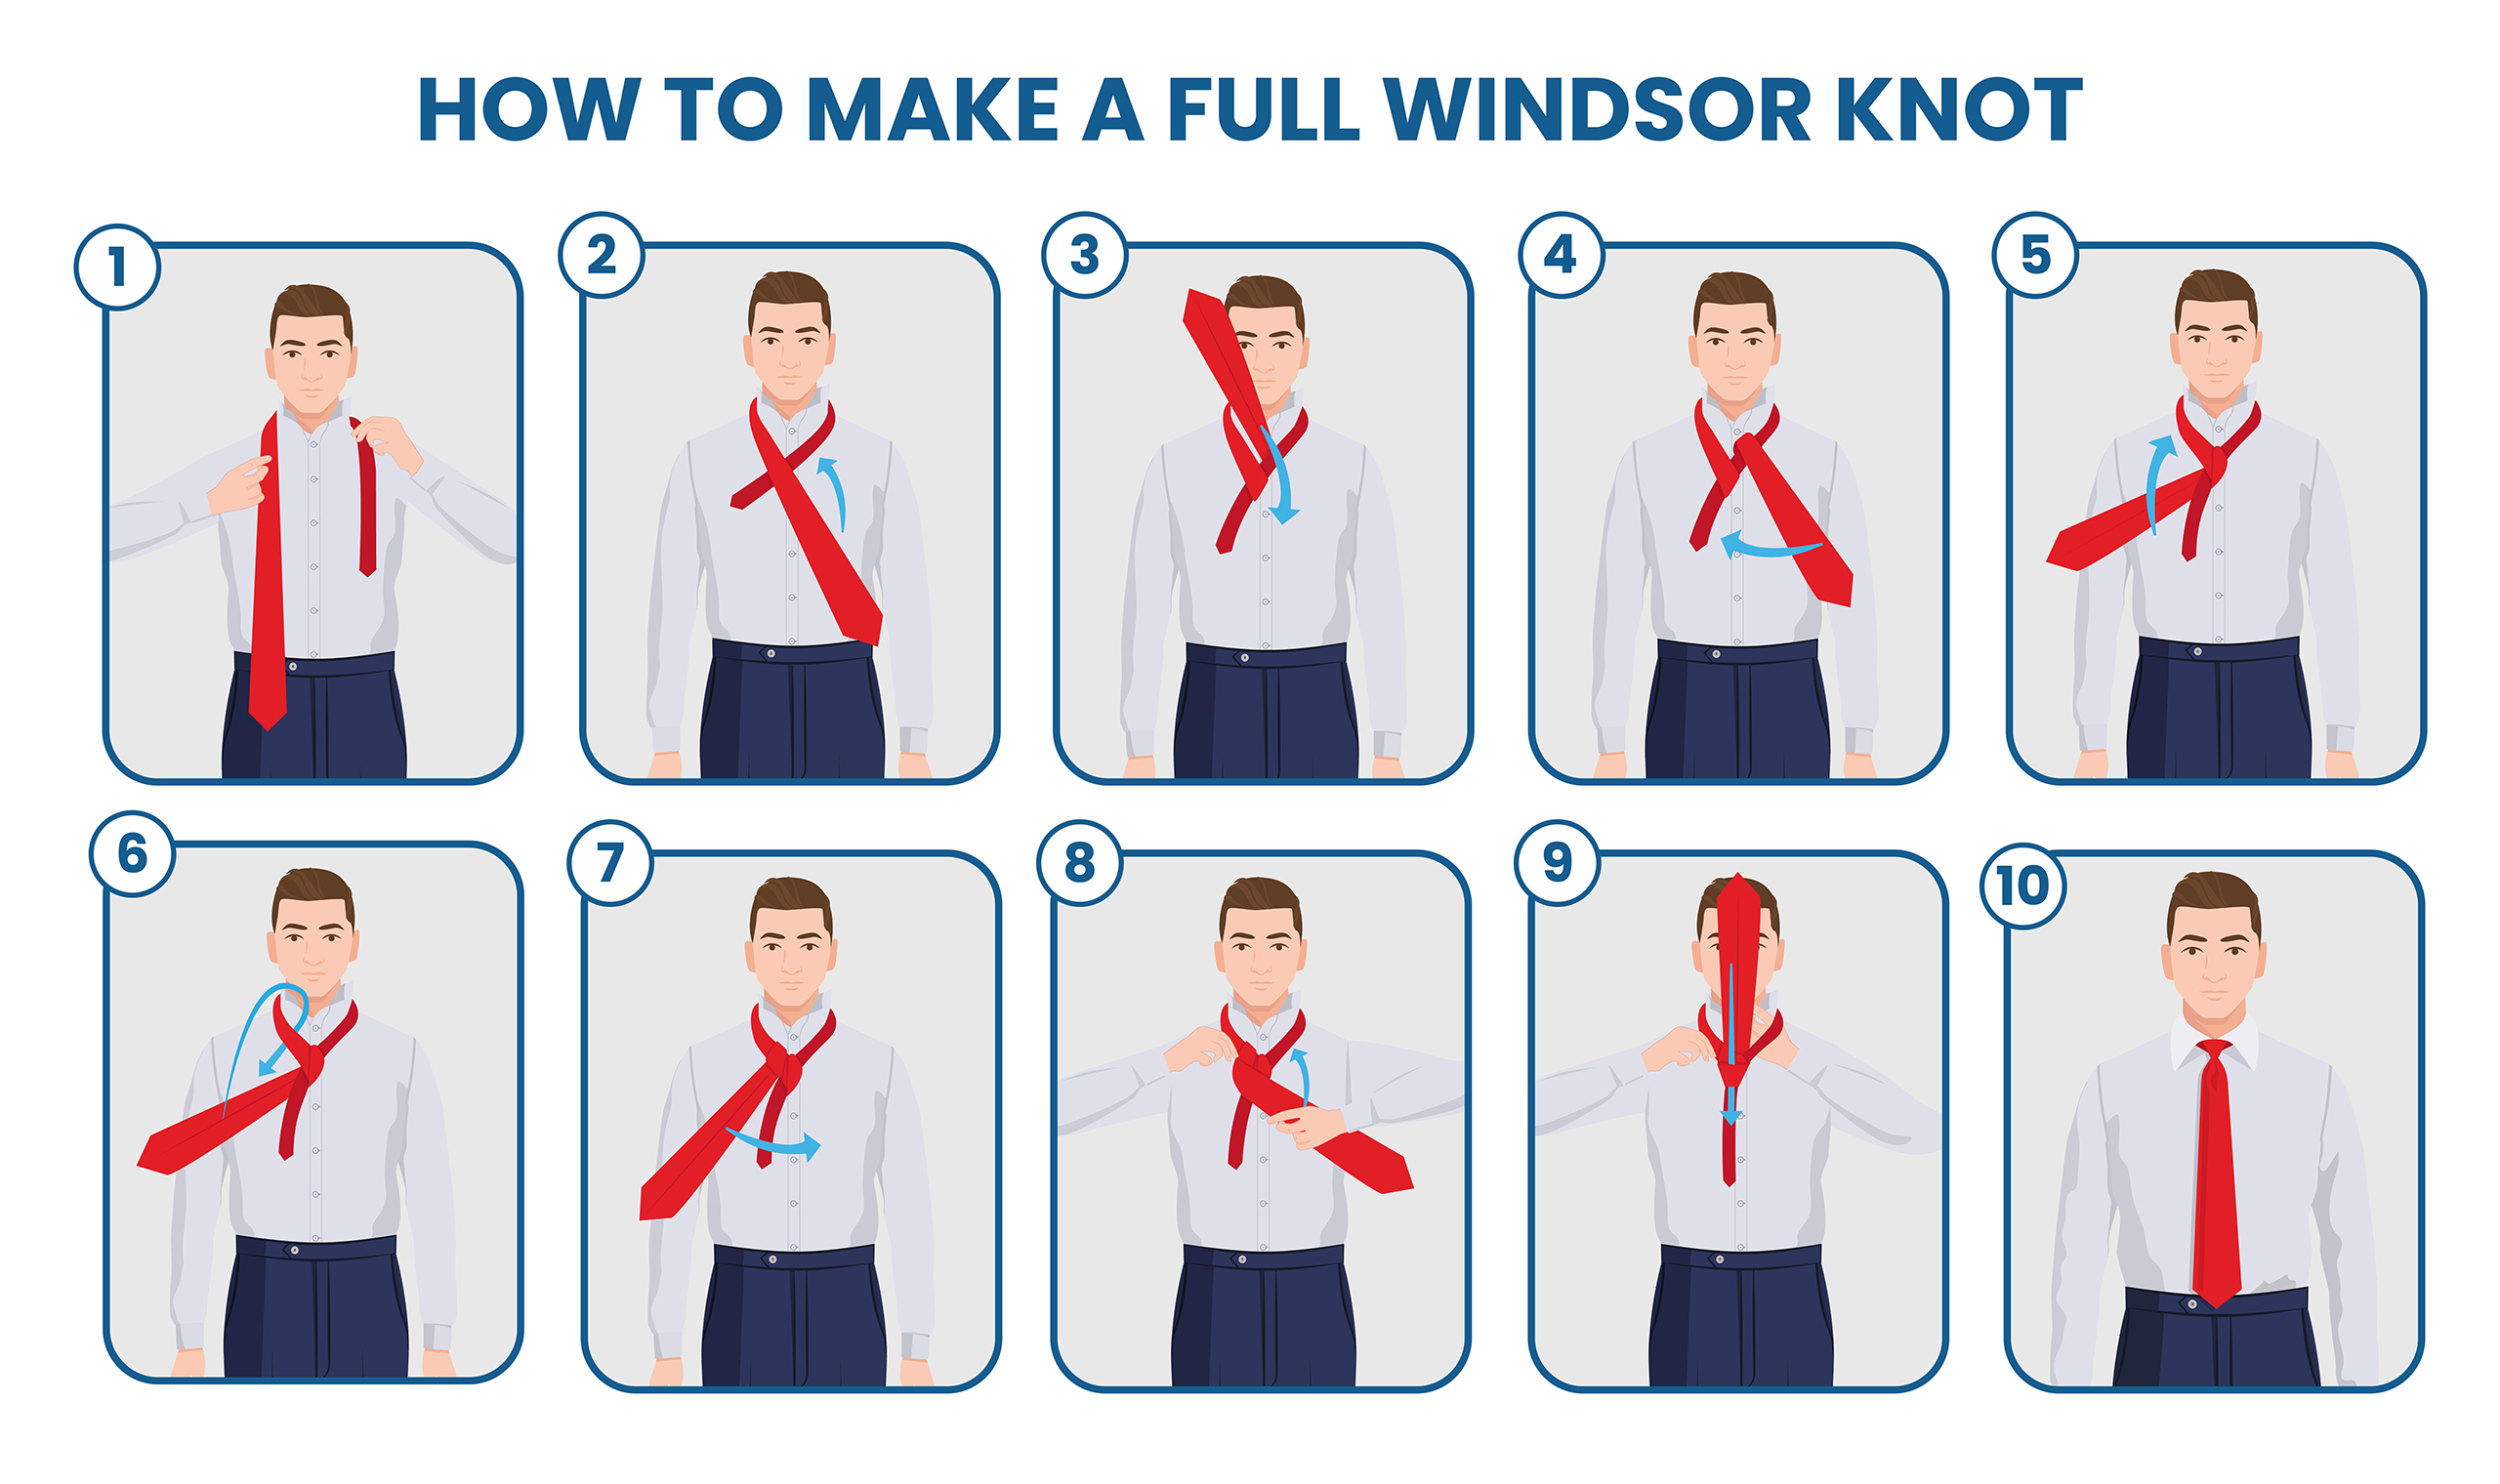
The tip of the wide end should rest approximately 5 inches below your belt, while the tip of the narrow end should lie around your mid-chest.
You may need to play around with placement once you’ve practiced this knot a few times if you find your ends aren’t correctly aligned once you’ve finished.
If you are left-handed, you can switch sides.
Place the Wide End Across the Narrow End
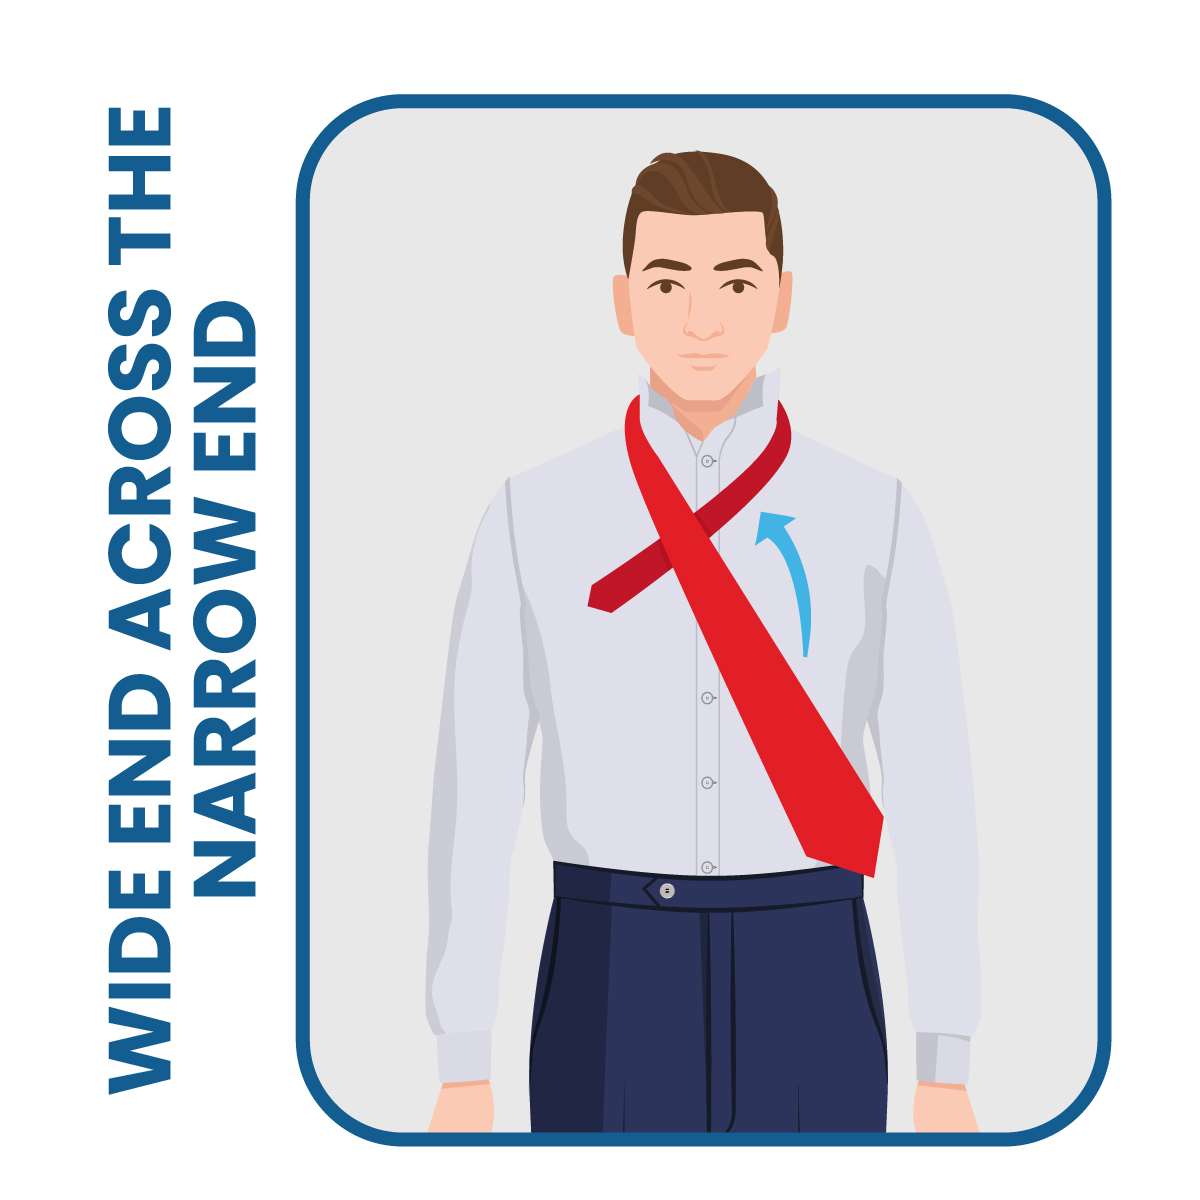
Grasp the shorter end of your tie in your left hand, holding it out and away from your body. This will form an X with your tie.
Cross the wide end over the shorter end, right where your finished knot will ultimately be.
Loop the Wide End Through the Initial Loop
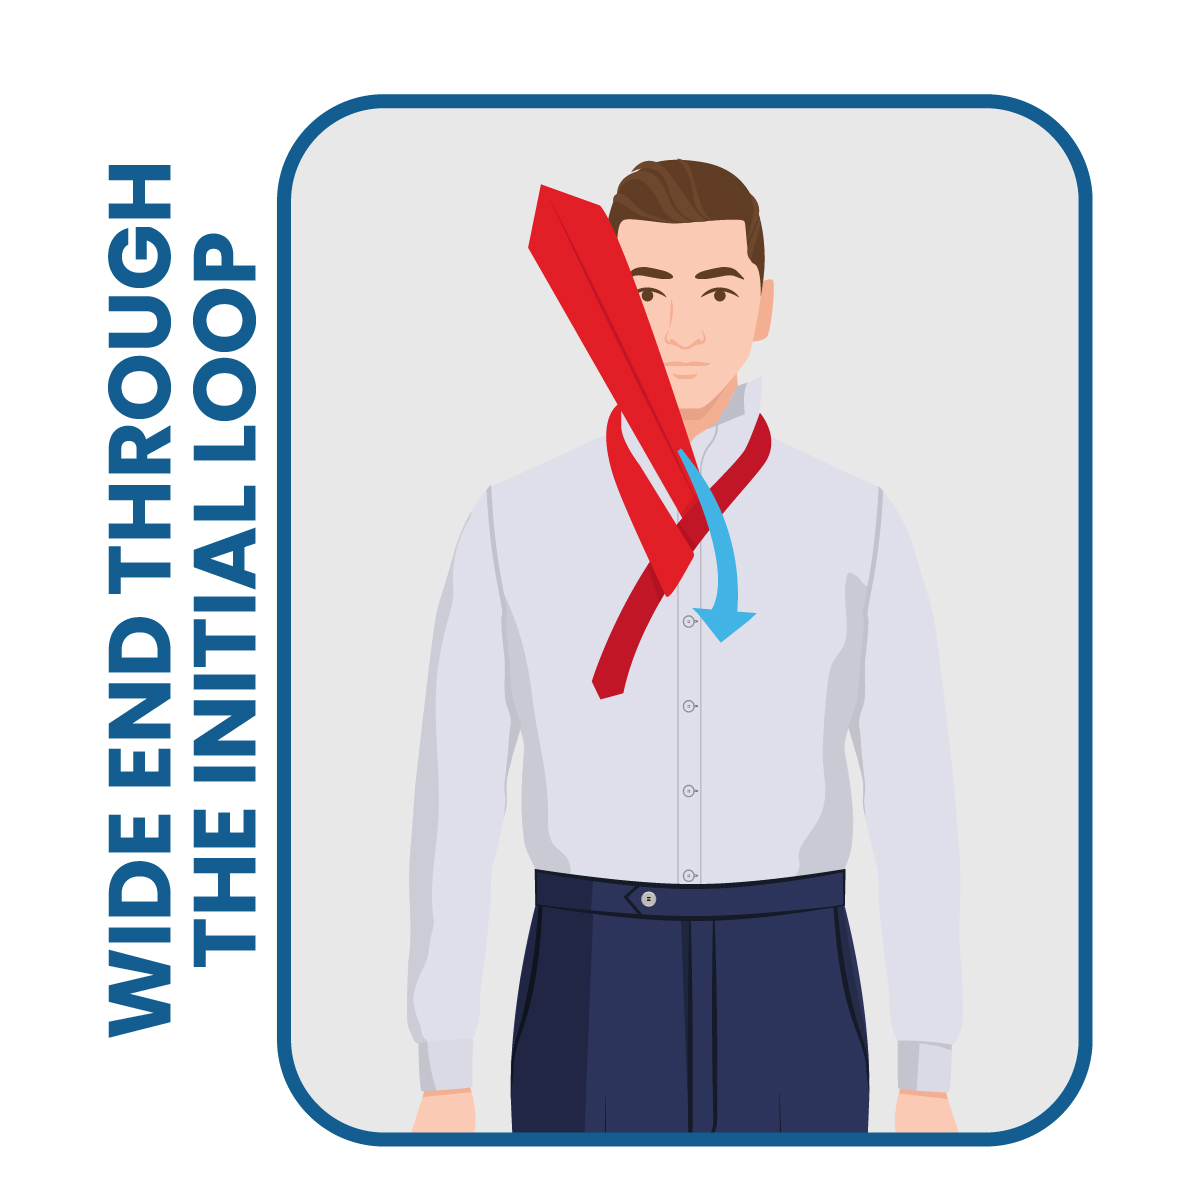
Slip the tip of the wide end of your tie through the loop you created, coming from underneath.
You’ll bring it from the front toward the back, toward your chin.
Pull the fabric all the way up and tighten it behind the X. Hold the X in place with your other hand.
At this point, the “right side” of the tie should be facing you.
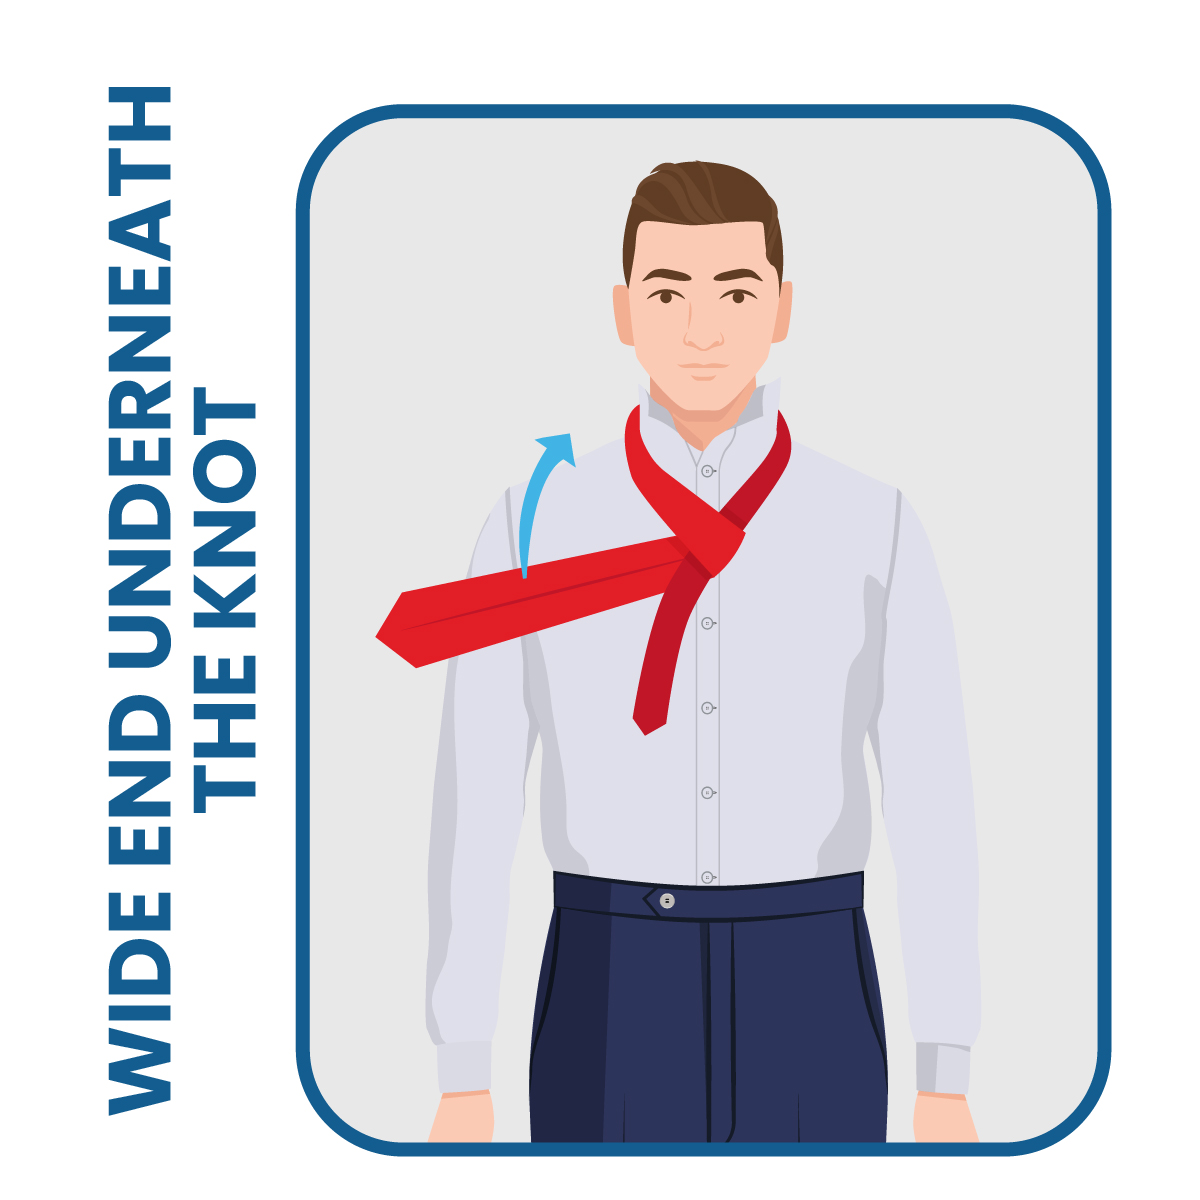
Move Wide End Underneath the Knot
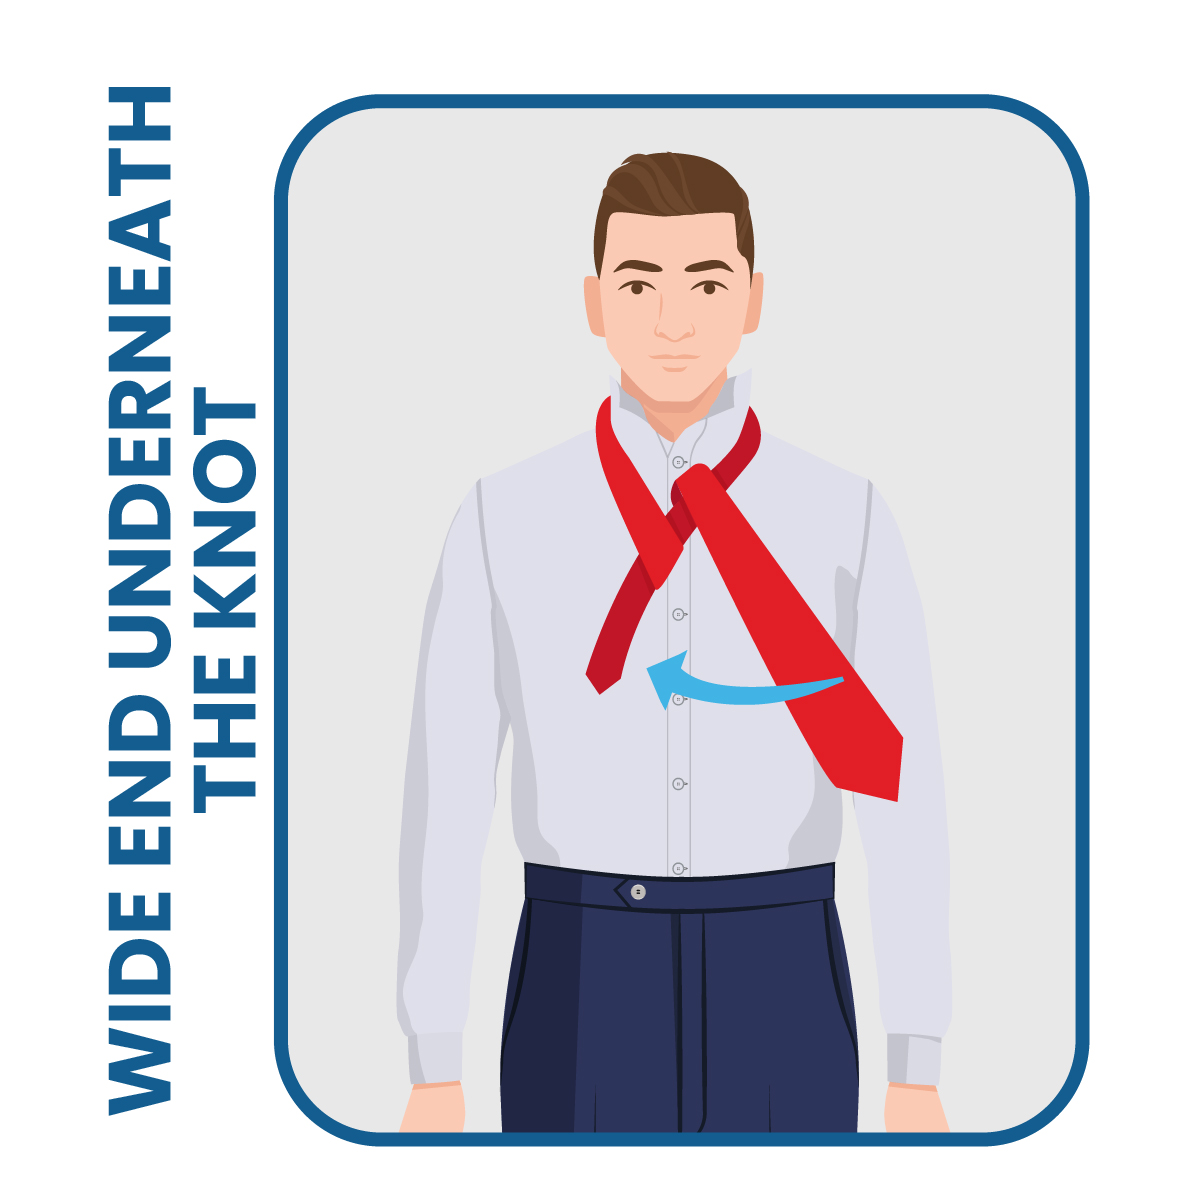
Still working with the wide end, fold the tie behind the knotted section.
This brings it across to the other side of your chest. Pull it taut.
You should still keep one hand holding on to the knot so it doesn’t fall apart.
Now the “wrong side” of the fabric is facing out.
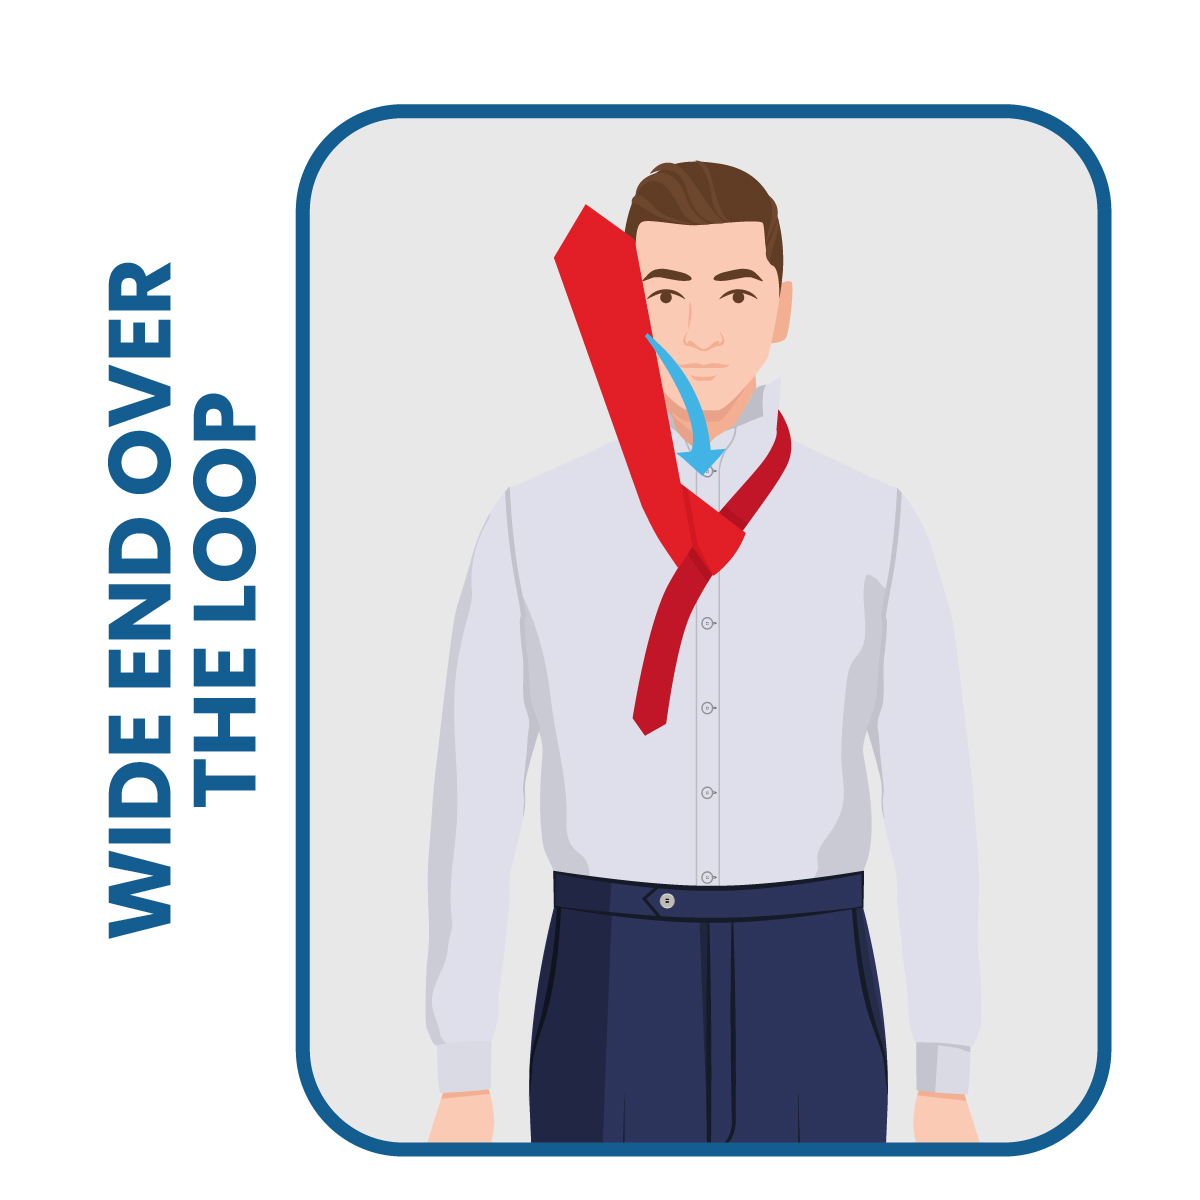
Bring the Wide End Through the Loop Again
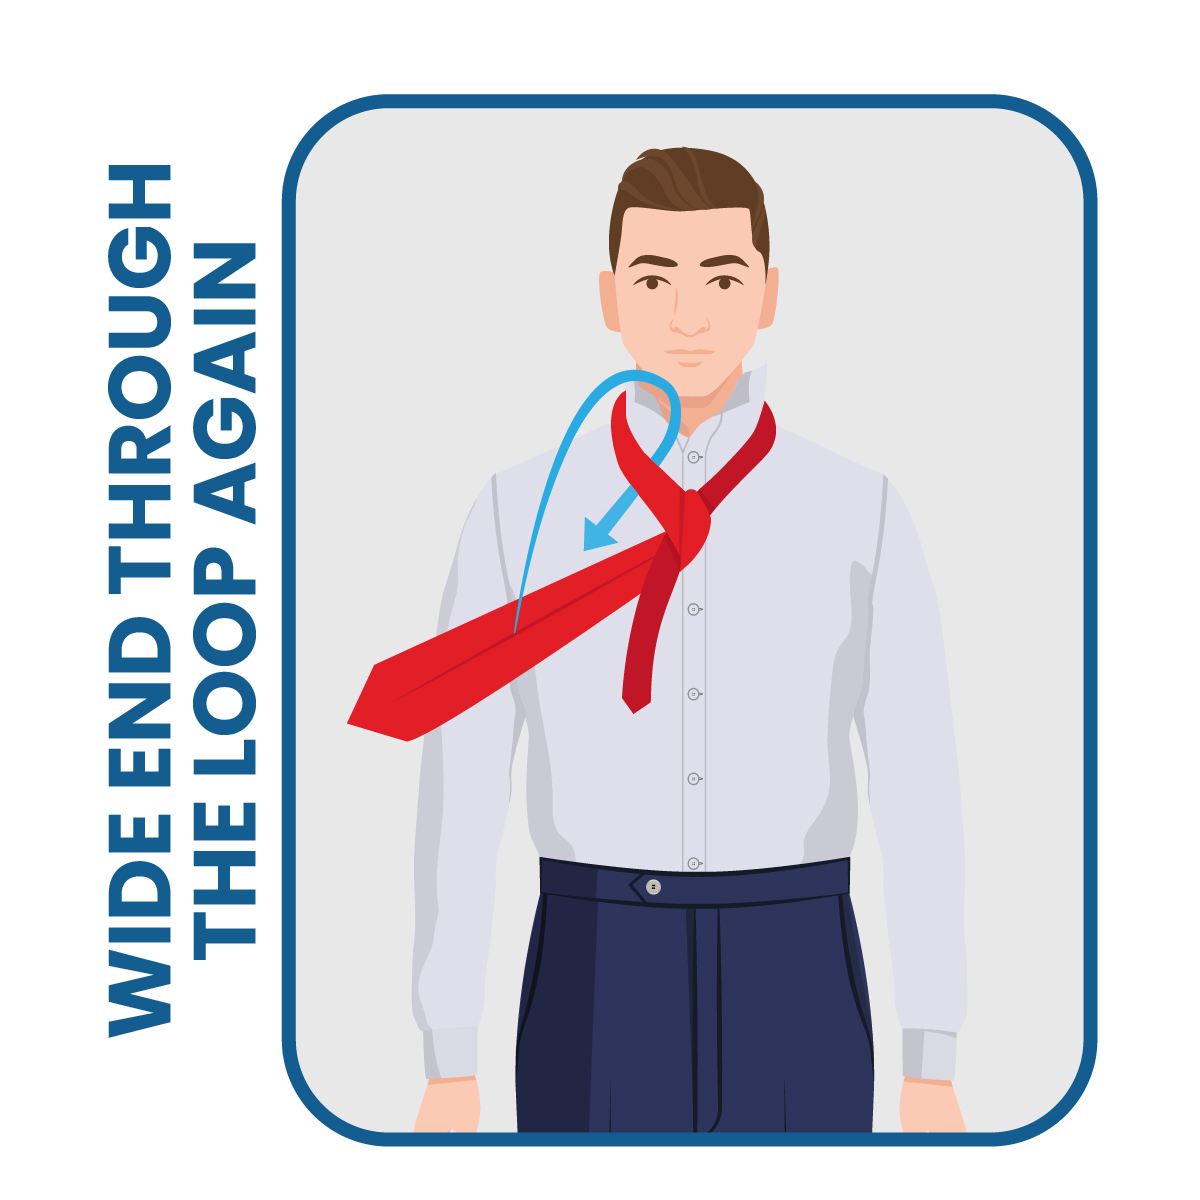
Once again, loop the wide end through.
This time, when you lift the wide end toward your face, the “wrong side” will be facing you.
Slide the wide end down through the loop, and pull it all the way down.
These steps create two cones. They must be symmetrical at this point for a proper full Windsor knot.
If they aren’t, do these steps over again.
Pull the Wide End Across the Front
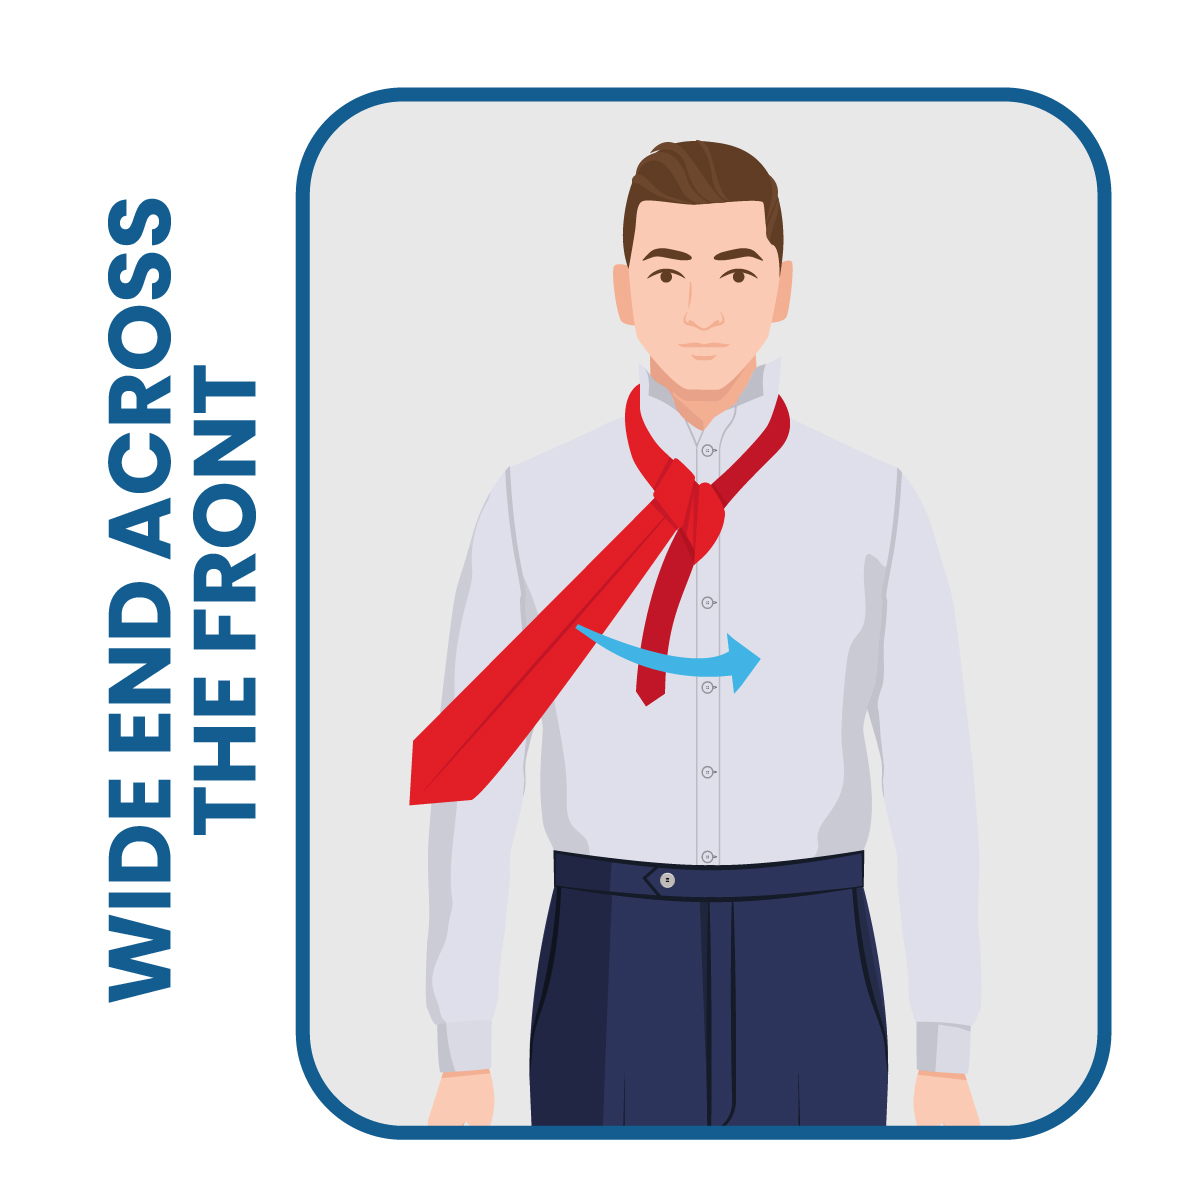
Again, cross the wide end from one side to the opposite side.
The fabric will go over the knot; be sure to keep pulling it tightly.
Remember to keep holding the knot in place with your other hand!
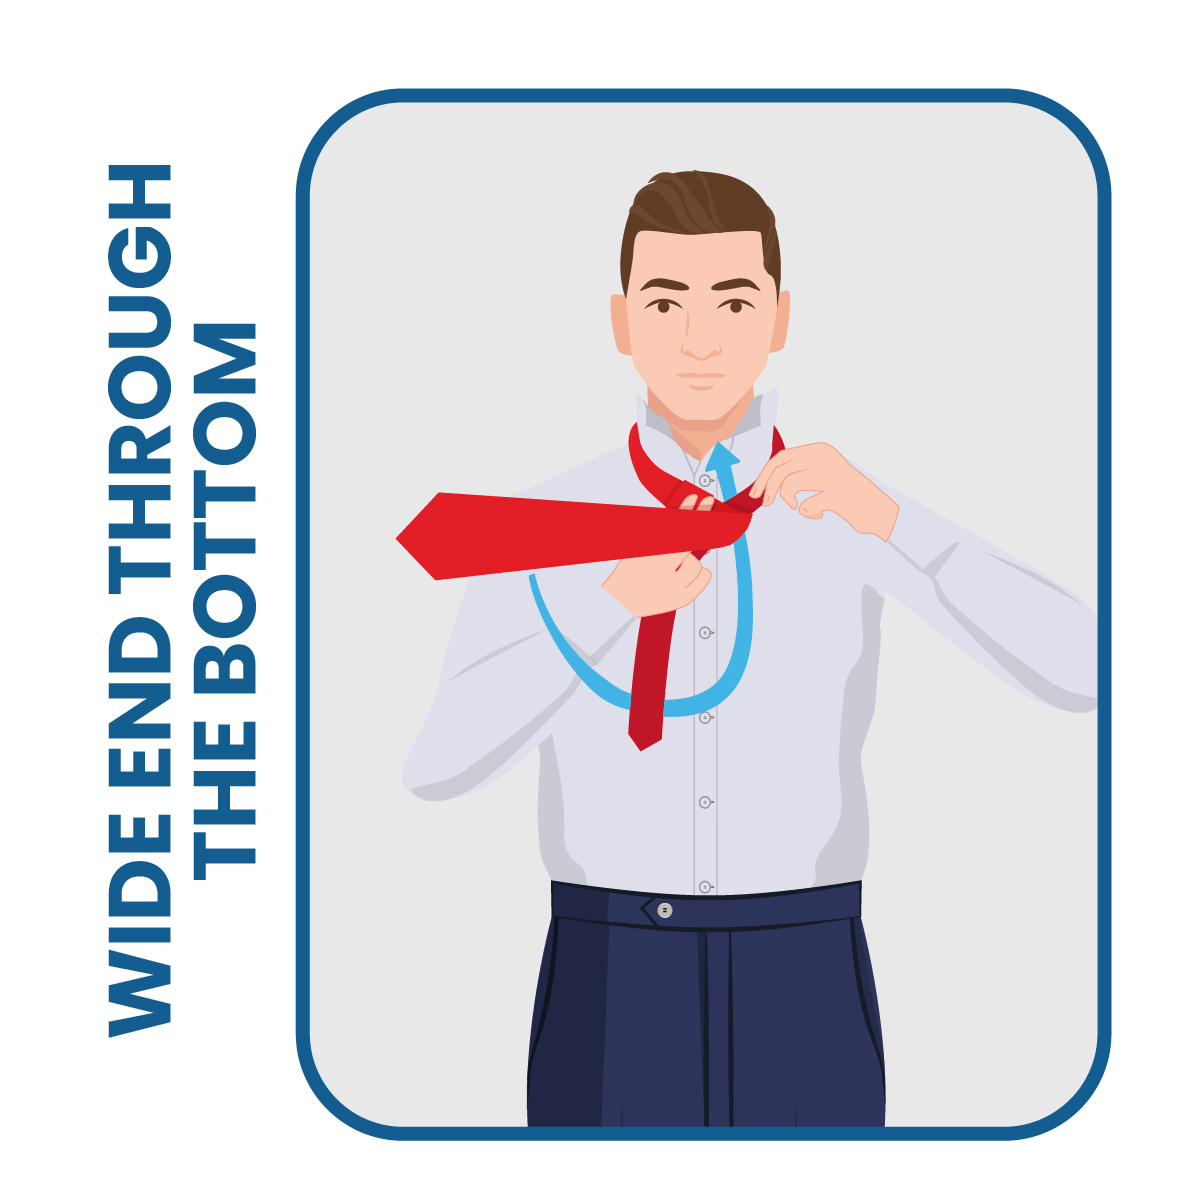
Loop the Wide End Through the Bottom
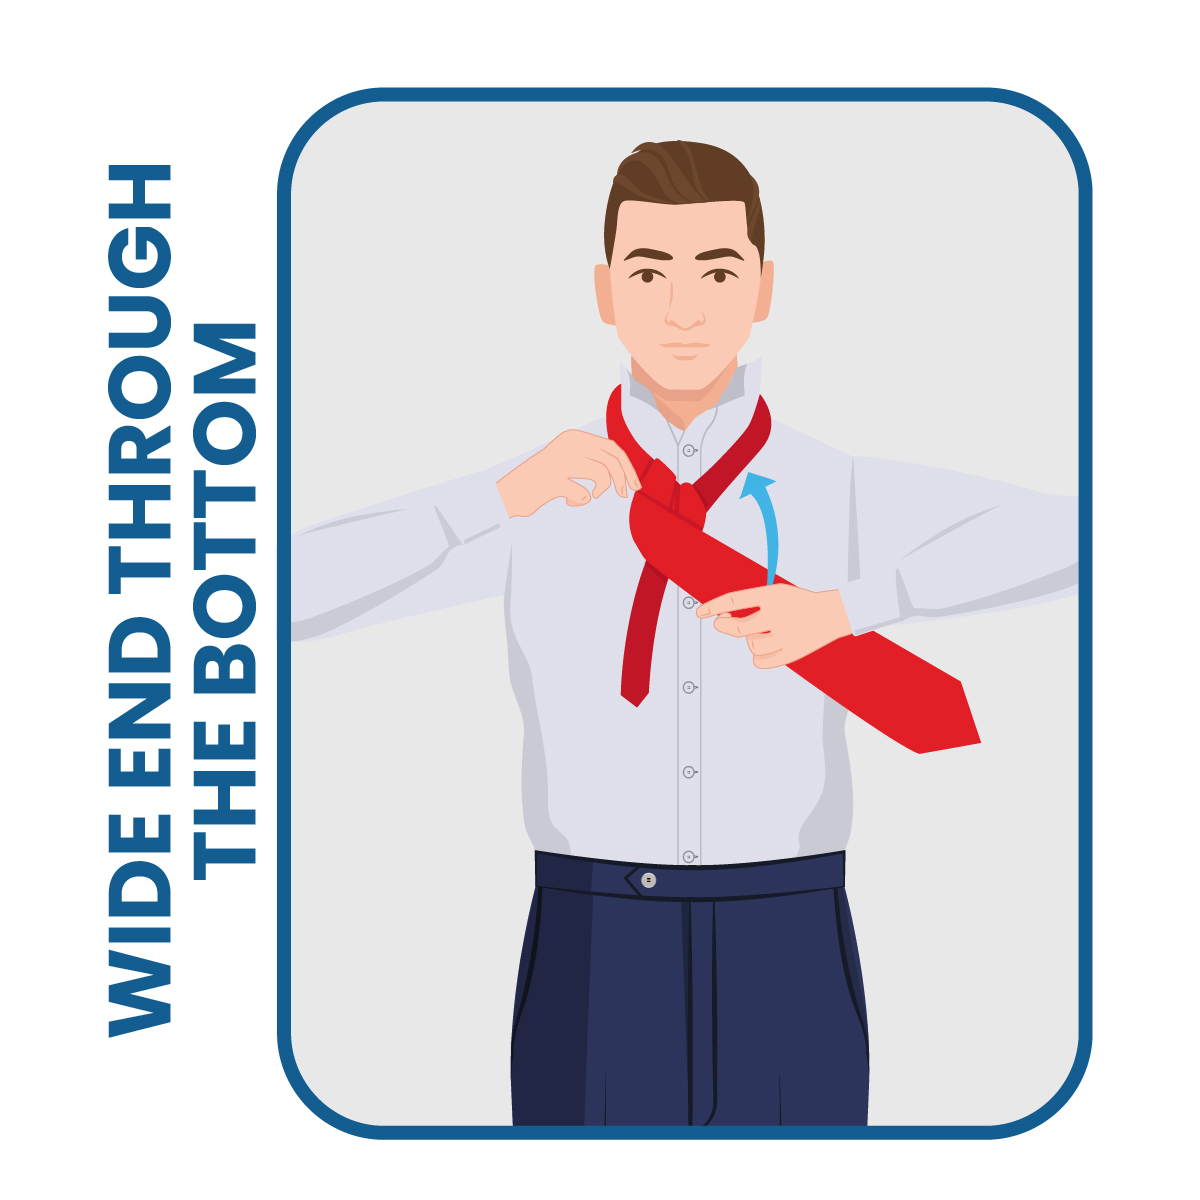
One last time, bring the top of your tie up through the loop from underneath.
Pull it all the way up and keep it tight. The “right side” should be directly in front of your face.
Pro tip: tilting your head back gives you more room to work this step.
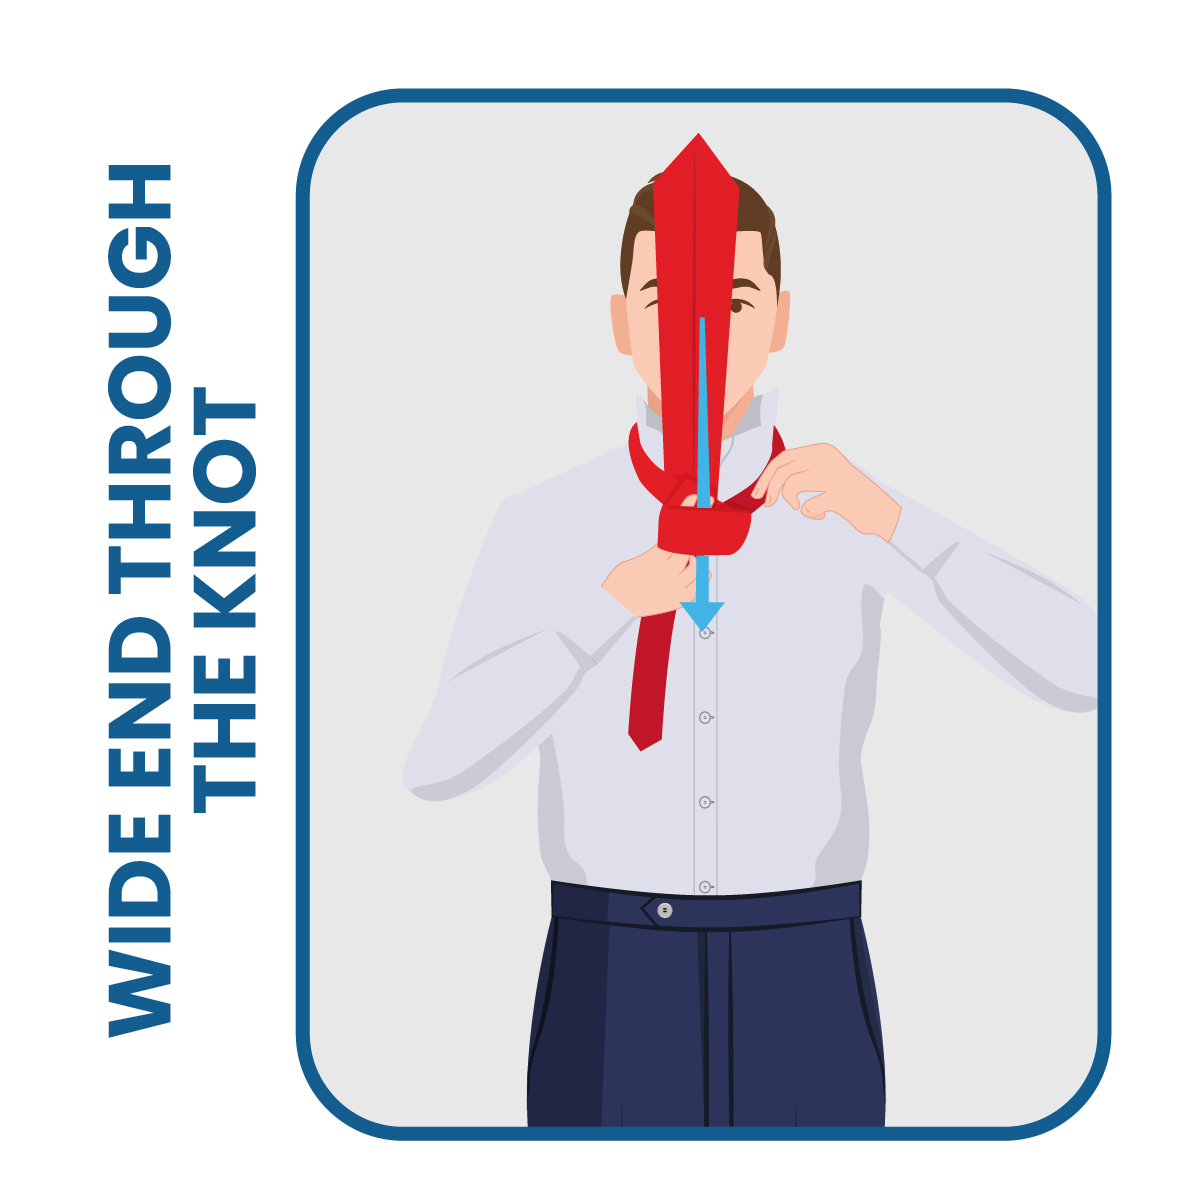
Move the End Through the Knot
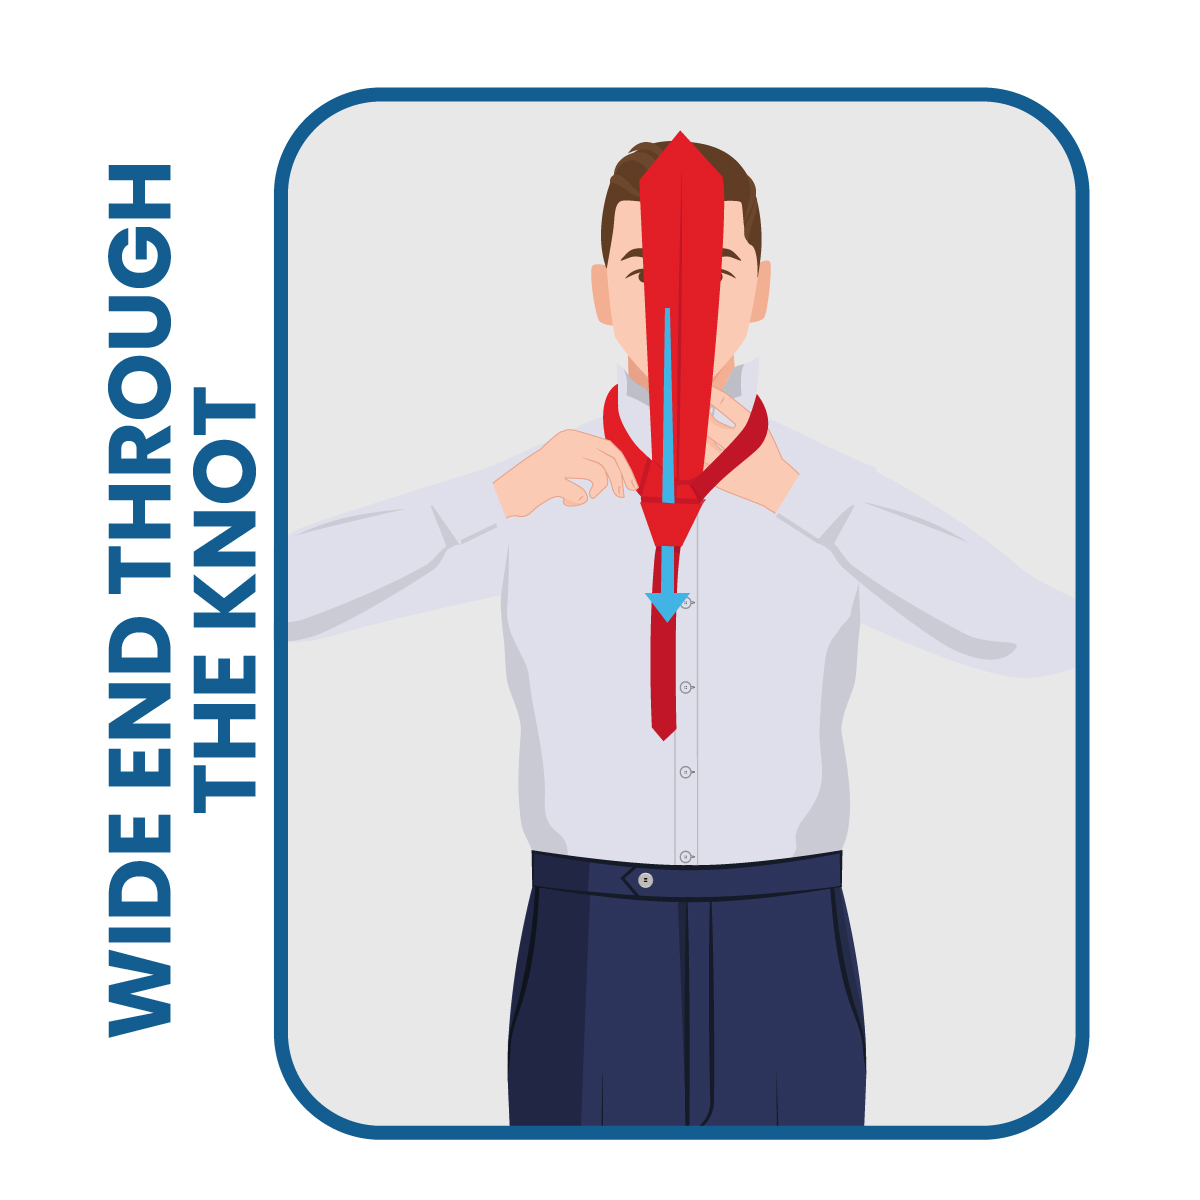
Bring the tip of the wide end down and slip it between the knot and the top piece of the fabric covering it.
You may have to push it through with your fingertips because it should be pretty snug.
Pull the end all the way through. You should now have the “right side” facing out, with the “wrong side” against your body.
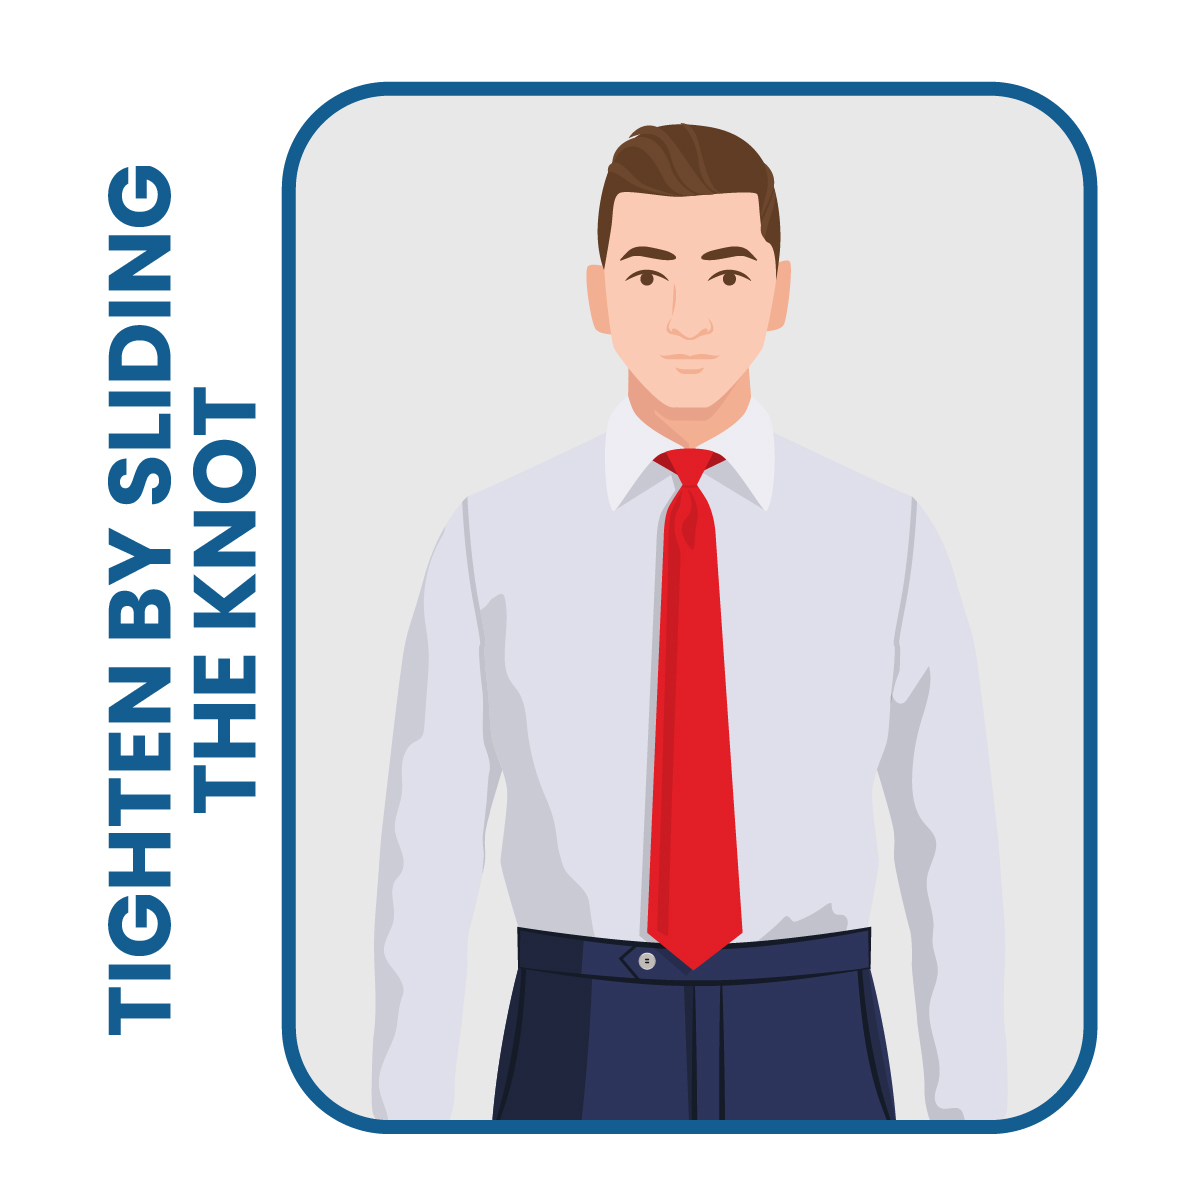
Hold only the narrow end, which now lies underneath the wide end.
Tighten by sliding the knot up to the top of your collar.
Now you’ve made a full Windsor knot, sometimes called a double Windsor knot!
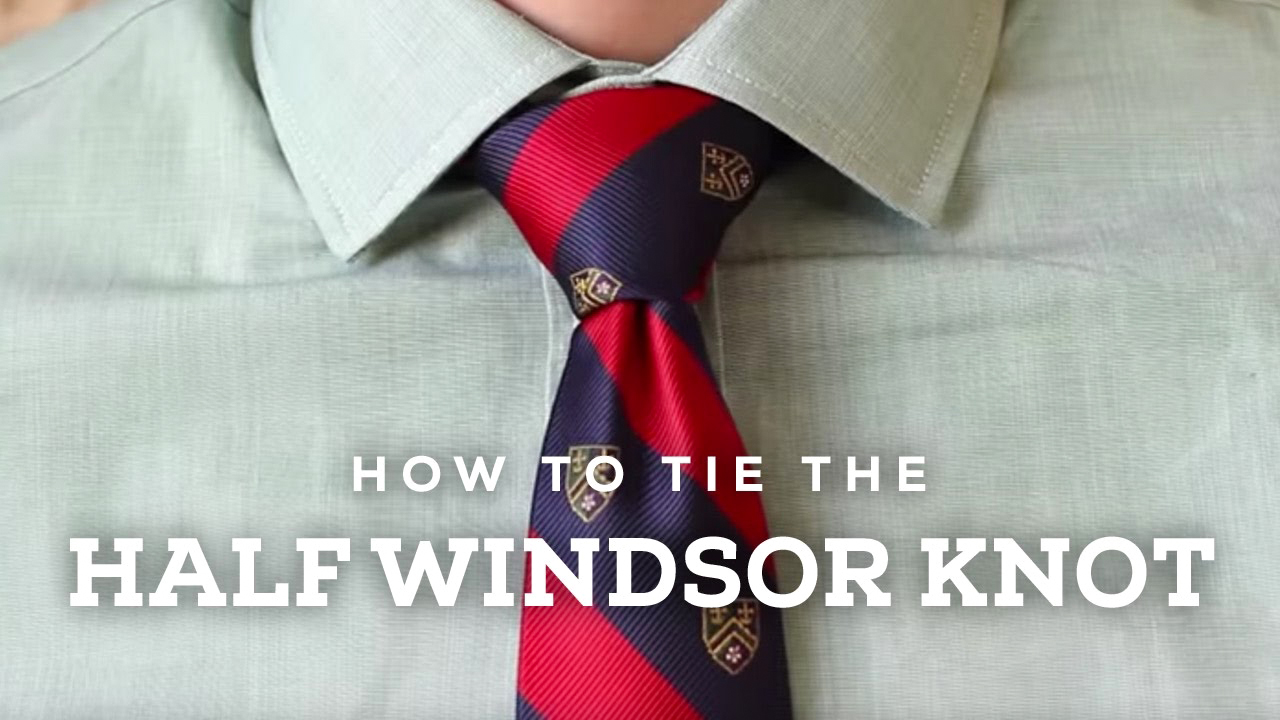
About the Half Windsor Knot
The half Windsor is a spin on the full Windsor; it likely came about as an effort to create a simplified version. This knot gained popularity in the 1950s.
Like the full Windsor, it’s a symmetrical tie knot. However, it’s smaller.
Where the full Windsor is a large knot, the half Windsor is medium-sized. Wear this with a medium spread collar shirt.
It’s a perfect way to wear your tie for all your most professional interactions, such as business meetings or job interviews.
How to Tie the Half Windsor Knot
Just as when you start for a full Windsor, drape your tie around the back of your neck.
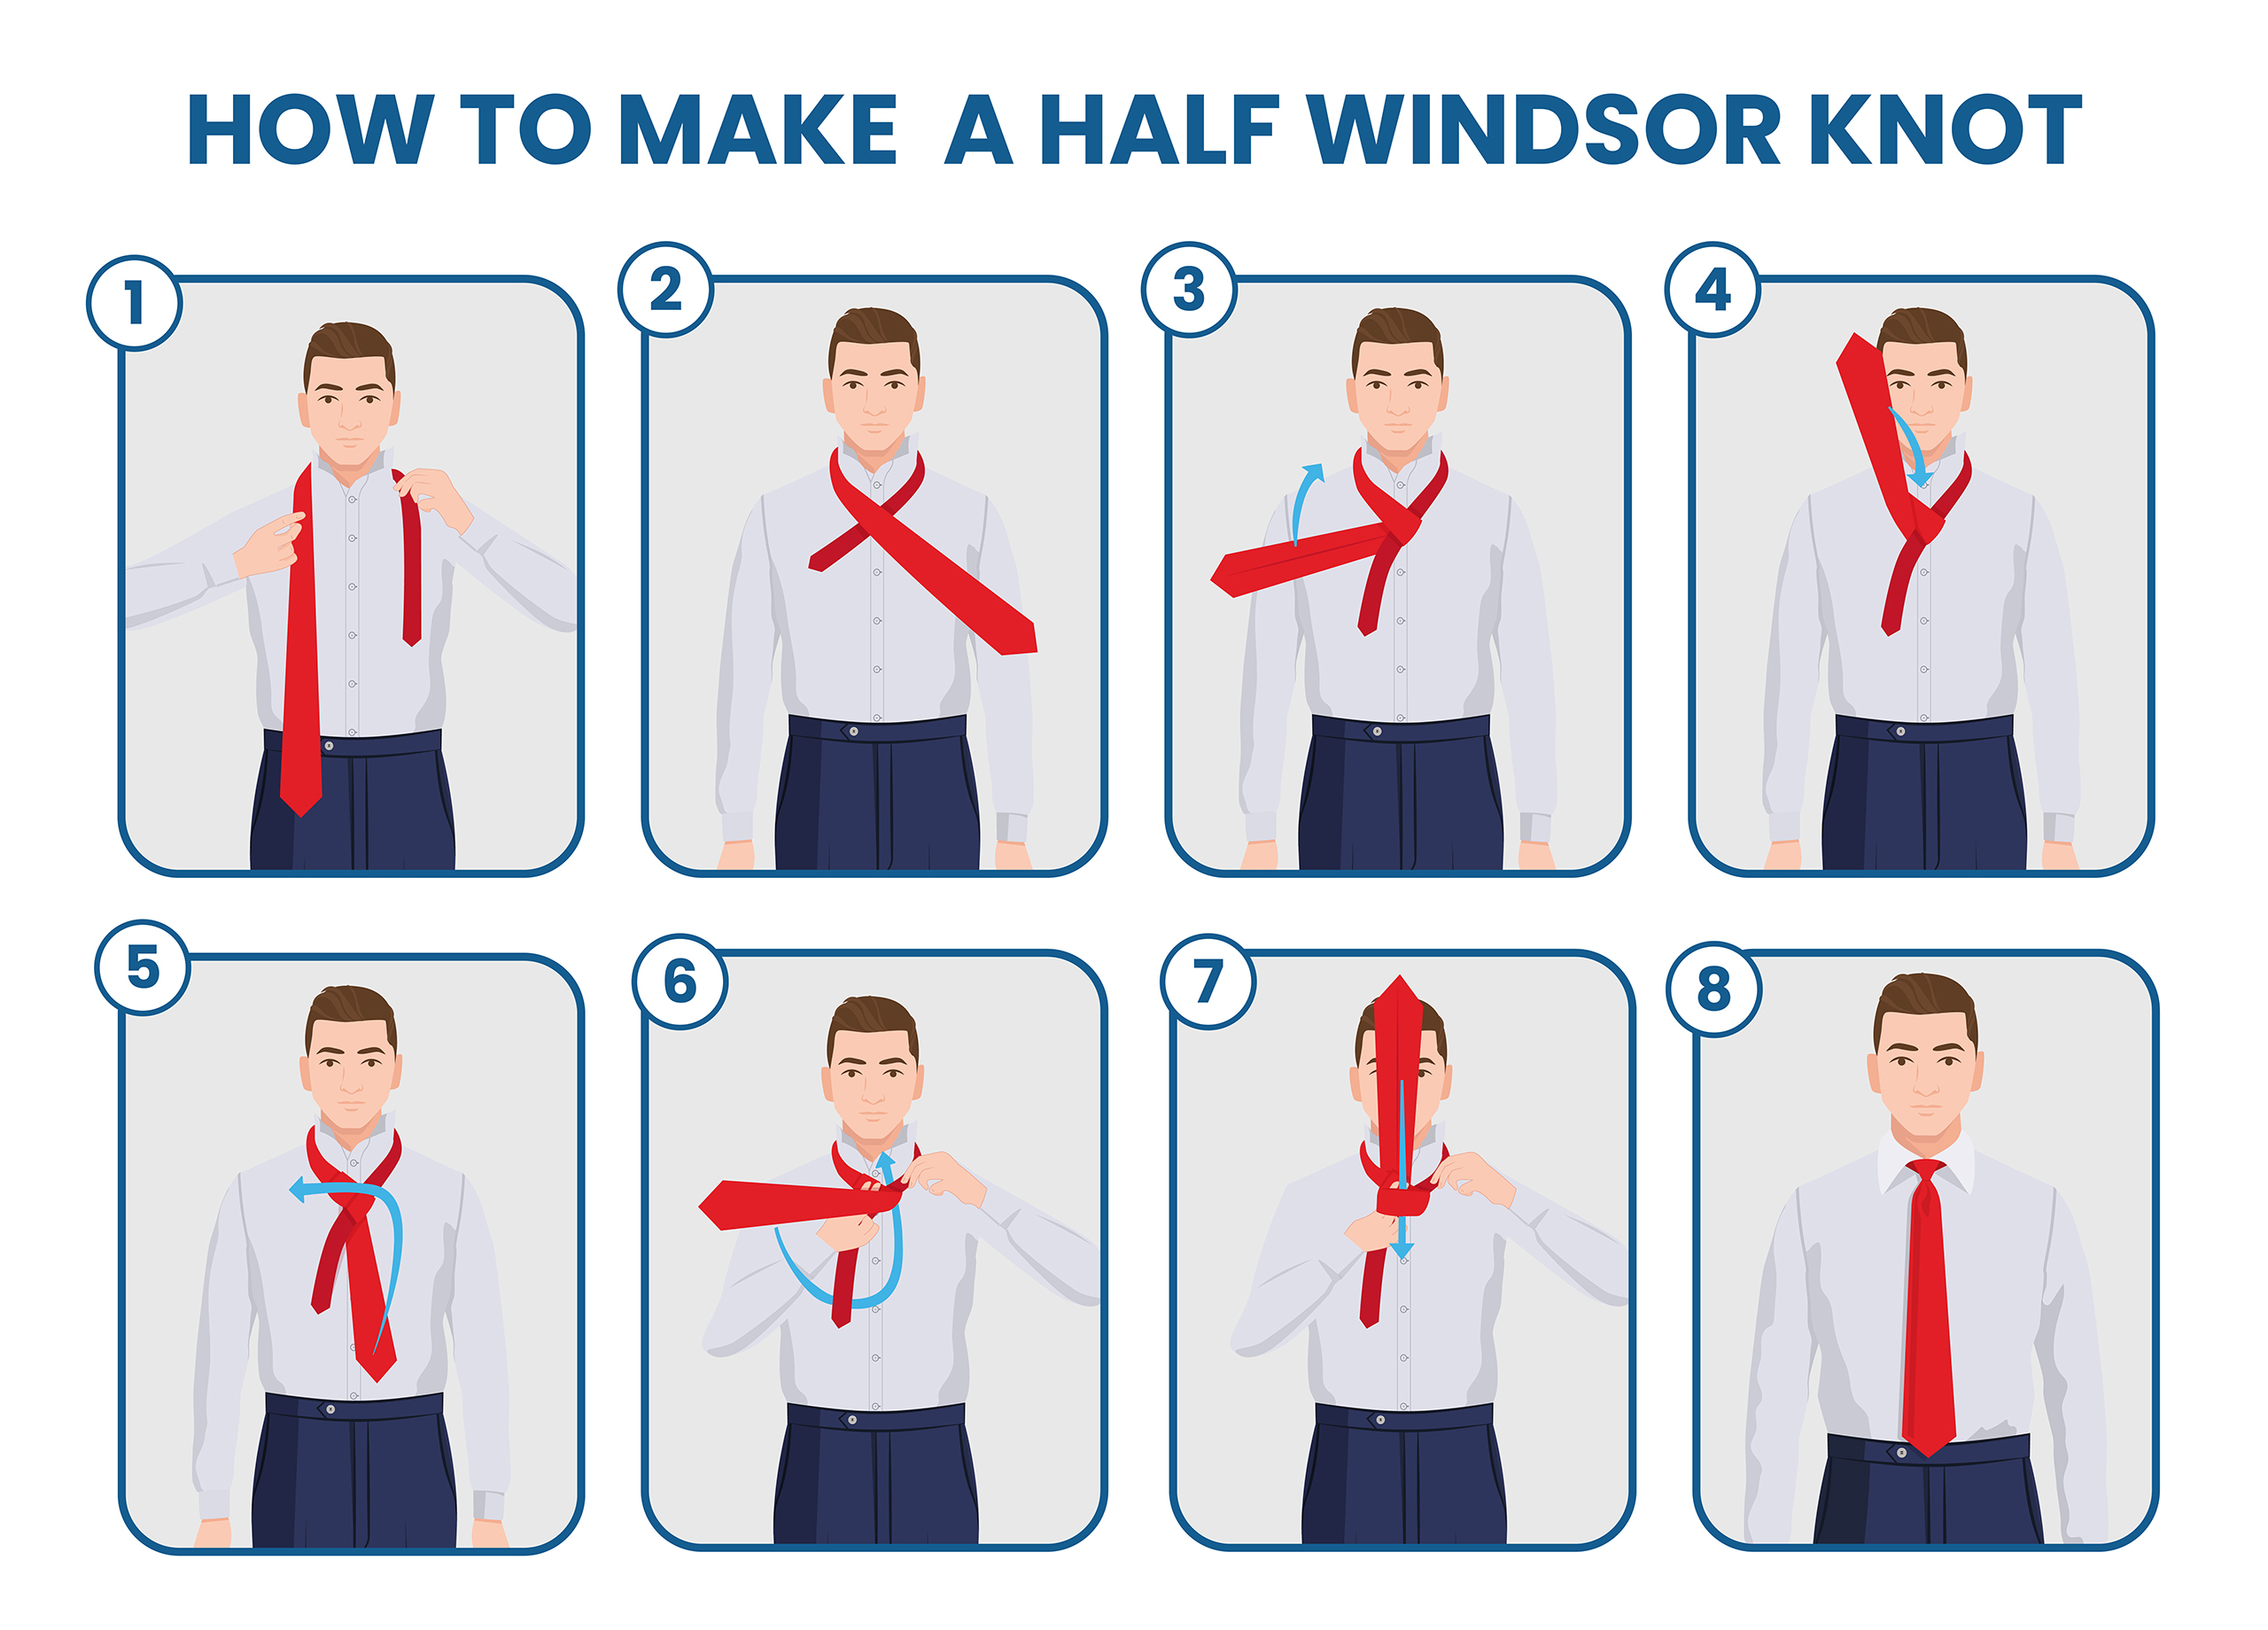
The “right side” faces outward. The wide end should be over on the right side, and the narrow tip should sit right around the level of your belly button.
Again, you can alter which side the wide end is on if you are left-handed.
Place the Wide End Across the Narrow End
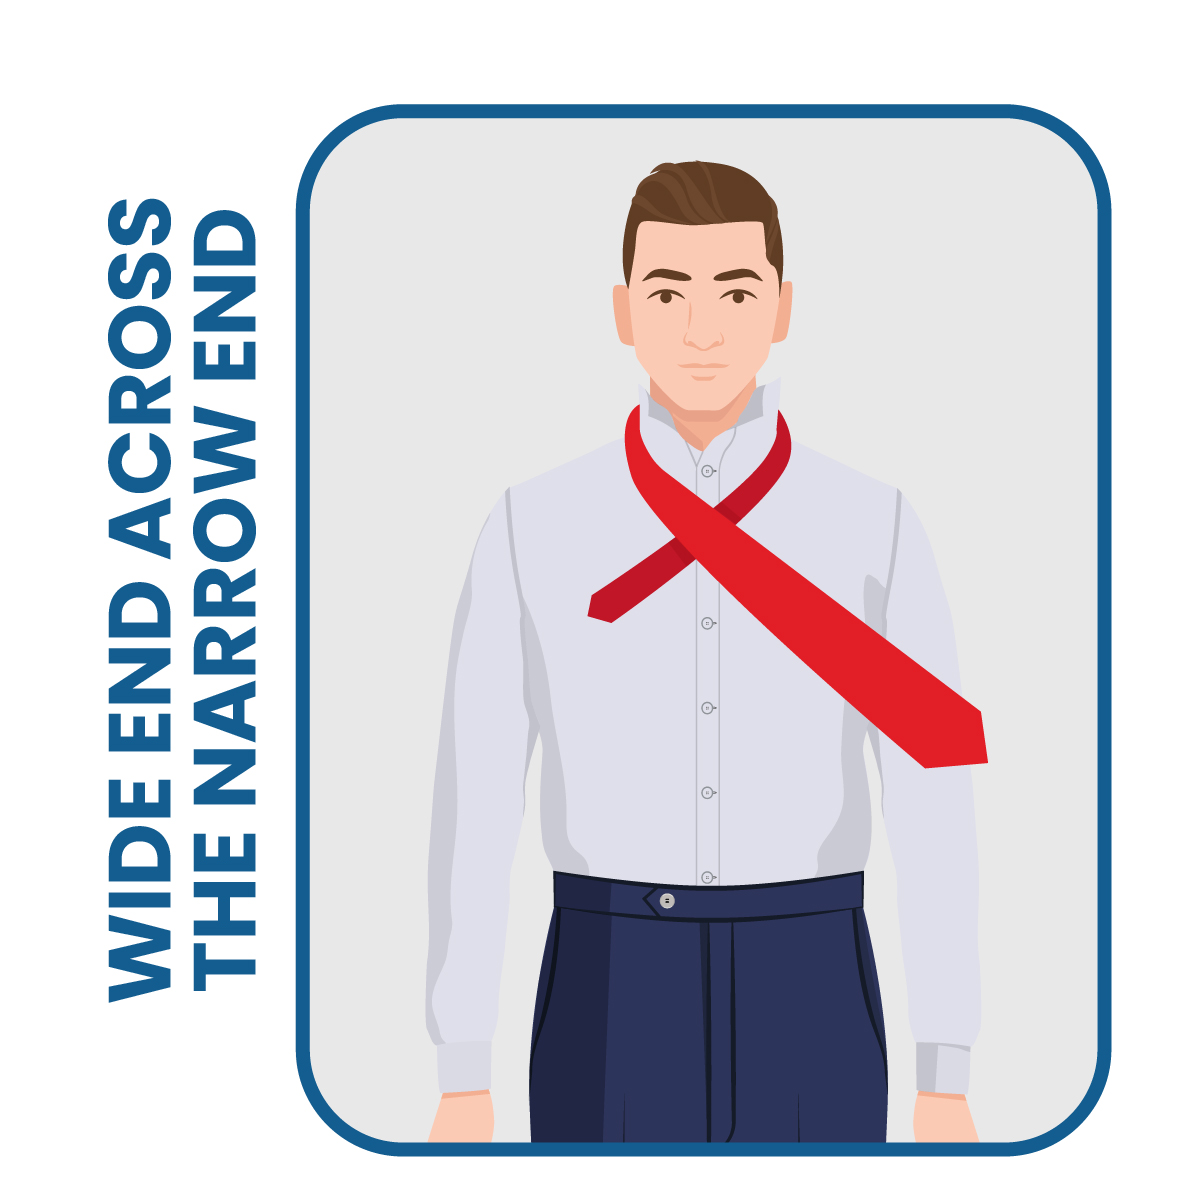
Cross the two sides of your tie, high up under your collar, to be relatively tight.
Do this by bringing the wide end across over the narrow end. Again, this will form an X shape.
Move Wide End Underneath the Knot
The next couple of steps seem slightly tricky at first but are easy once you’ve practiced them.
Fold the wide end behind the narrow end, crossing it back under the X you’ve just made. Again, remember to keep it tight.
The “wrong side” of the wide end should now face outward.
Bring the Wide End Over the Loop
Bring the wide end up through the loop, going in through the top and coming out from the bottom.
Now the wide end is on your left side.
Be sure to pull it tight here, so you don’t wind up with a loose knot when you’re finished.
Pull the Wide End Across the Front

Now cross the wide end over the top of the knot to the right side.
This creates a flat piece of fabric across the face of your knot. Clasp those pieces together with your other hand.
Loop the Wide End Through the Bottom
Slide the wide end up through the loop from behind.
The “right side” of the tie should face you as it comes up, and the tip of the wide end is above the knot.
Move the End Through the Knot
Finally, tuck the tip of the wide end through the knot and the fabric resting across it.
Push it through with your fingers and pull it out from underneath. Now your two ends of the tie should be lying on top of each other.
Hold onto the bottom piece, the narrow end, and push the tie closer toward your throat.

Hi, I’m Alex, and I’ve studied and specialized in styling in Rome. Through my writing, I want to help men dress well and learn the purpose and significance of suits and other formal attire. My final goal is to make men more confident in their wardrobe choice and life in general.